
Have you ever spent more time searching for a tool than actually using it? For anyone who enjoys woodworking, metalworking, or automotive repairs, this frustration is all too familiar. A cluttered workspace not only slows down your projects but diminishes the joy of working with your hands. The good news is that designing an efficient metal workshop layout can revolutionize your productivity and make your space a pleasure to work in.
Before diving into specifics like where to place your workbench or which storage solutions to use, there are some fundamental factors you need to consider. These initial steps—such as determining the dimensions of your workshop, identifying key activities, and setting a budget—are crucial in laying the groundwork for an effective layout. By investing time upfront to plan wisely, you’ll find that minor adjustments can yield significant improvements in how smoothly your projects run.
A few days ago we published an article about the benefits of metal building shops across the country. This was part of our mini-series diving into the details about metal building shops and their benefits. Keep reading to learn more about the ideal metal workshop layout. If you’ve followed our articles in the past, you’ll have experienced the value we aim to provide. Stay tuned for this mini-series and please don’t hesitate to share your thoughts with our team!
When designing a metal workshop layout, it’s essential to prioritize an organized space by defining specific zones for tasks like materials storage, cutting, and welding. Additionally, ensuring adequate lighting, tool accessibility, and maintaining pathways free of obstacles will enhance productivity and safety within the workspace.
Initial Considerations for Your Metal Workshop
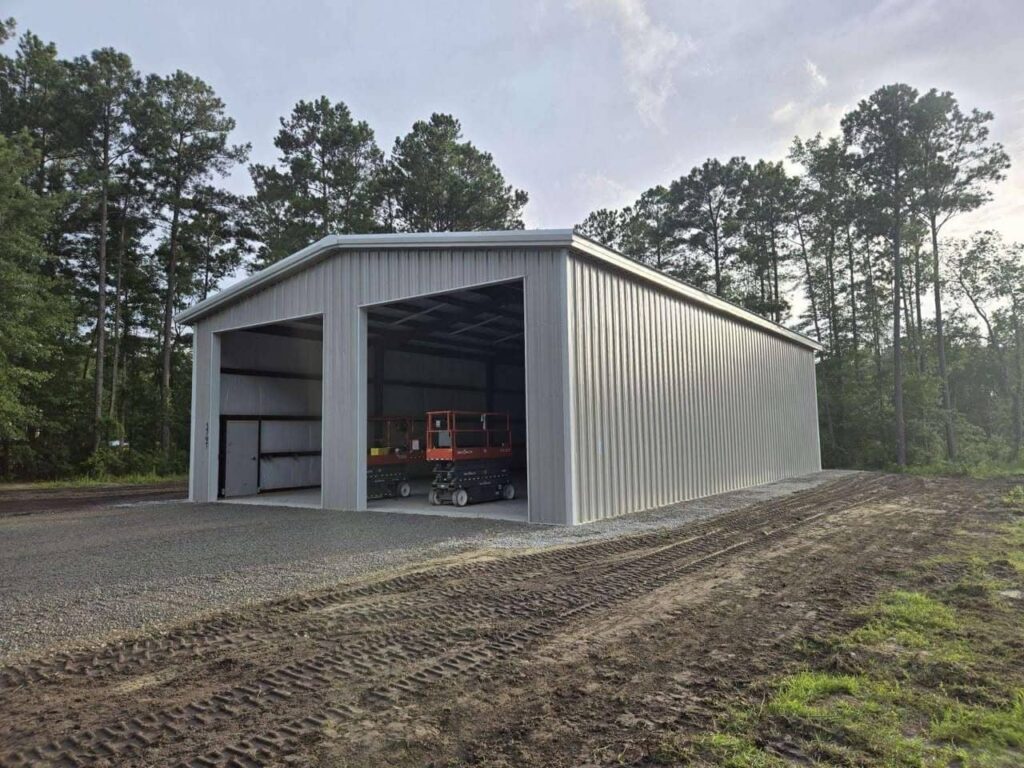
One of the first steps in establishing an efficient metal workshop is to determine the size of your space. The dimensions matter greatly, as they dictate how you’ll arrange your tools and equipment. Whether you’re working with a sprawling building or a compact space, it’s crucial to measure your available area accurately. A well-planned layout will allow for smooth workflow, as you won’t have to maneuver around obstacles or cramped spaces while working on your projects.
The next step is to identify the primary activities that will take place within the workshop. Each activity necessitates specific setups to ensure efficiency and safety. For instance, if welding will be a focus, you’ll need to prioritize excellent ventilation to disperse hazardous fumes. Conversely, if metal cutting is your main endeavor, incorporating effective dust collection systems becomes vital to maintain air quality and cleanliness.
Consider also how each workspace interacts with others; for example, having your cutting zone adjacent to your welding area can streamline the process but requires careful planning to manage sparks and debris.
Along with understanding the space and activities, budget planning is essential. You’ll want to determine upfront how much you’re willing to invest in both constructing and equipping your workshop. It’s tempting to skimp on certain items or features in order to save money initially, but remember that compromising on essentials like safety equipment can lead to larger costs down the line—both financially and in terms of risk to personal safety. Allocating funds effectively ensures that you maximize every dollar spent while still incorporating necessary features.
Long-Term Considerations
Now, let’s look ahead: long-term considerations play a significant role in workshop planning. Think about future-proofing your space by accounting for potential expansions or additional equipment needs. If you envision increased production capacity later on, it would be wise to design your layout with extra room for machinery or worktables in mind now rather than redoing things later at additional cost and effort. Flexibility in design can save both time and resources in the long run.
With these key aspects in mind, you’re now prepared to shift your focus towards outlining the specific projects and tasks that will make full use of this thoughtfully designed space.
Planning Your Projects and Tasks
Successful workshop design relies heavily on a thoughtful approach to planning your projects and tasks. This means taking into account the specific types of work you’ll be doing, which will allow you to tailor your layout effectively. Imagine stepping into your workshop and knowing exactly where everything is and how every project will flow—that’s the goal of a well-thought-out space. Taking the time to consider your workflow not only streamlines the process but also nurtures creativity and productivity.
Project-Based Zones
One essential element in this planning phase is creating designated zones within your workshop for different tasks. For example, establishing a cutting zone separate from welding or assembly areas is crucial. This kind of compartmentalization minimizes cross-contamination of materials, including dust and fumes, keeping each area focused and functional. It helps maintain cleanliness and makes it easier to switch between tasks without having to clear out remnants from one process before starting another.
Think about how good organization can prevent accidents. When tools and materials are accounted for in their designated spaces, there’s less room for error.
A user on a woodworking forum once mentioned successfully optimizing their workspace by placing their cutting station near the entrance for easy movement of larger material while configuring their welding zone at the back away from other activities to ensure proper ventilation. Such personal experiences serve as effective inspiration in understanding how specific layout decisions impact overall functionality.
Workflow Optimization
Another key aspect to consider is workflow optimization. Organizing your layout based on the cycle of your projects—from raw material storage to cutting, then welding, and finally assembly—creates an efficient process flow. By aligning the physical steps required with your workspace design, you can eliminate unnecessary movements that waste time and energy. This boosts efficiency and contributes to better focus on the task at hand.
Furthermore, visualizing this workflow can be immensely helpful. Try sketching out a simple diagram of your workshop that maps out where each designated zone will go in relation to one another. It can be as simple as blocks representing various areas: storage here, cutting there, welding next—and so on. This methodical approach gives a clearer picture of where everything belongs and helps prevent chaotic clutter during busy project phases.
Once you’ve established how to organize your projects efficiently, the next step involves strategically arranging equipment and workbenches to optimize both safety and functionality throughout your workshop.
Positioning Equipment and Workbenches

Thoughtful positioning can make or break your metal workshop experience. For instance, consider that heavy machinery such as welders or lathes should be placed against walls. This practice saves space and helps maintain a clear central area for activities like assembly. It’s akin to setting the stage for a performance; you want everything in place for all the right actions to take center stage.
Strategic Placement
When planning your layout, think about how often you use each piece of equipment. Place the tools you utilize most frequently in easily accessible spots.
Corner placements are particularly effective for larger equipment, freeing up crucial floor space for movement and interaction with other tools or materials. Imagine navigating a crowded room—having enough space to move comfortably ensures safety and efficiency.
Safety Tip: Always ensure there’s adequate clearance around your equipment. Ideally, aim for at least 3 feet of space to prevent accidents. This distance acts as a buffer zone, reducing the risk of injuries when moving between tools or while adjusting machinery settings.
Additionally, having your workbench situated near power sources is essential to avoid potential hazards from extension cords. Tripping over cords can lead to serious injuries and interruptions in your workflow. Instead, invest in mobile workbenches equipped with wheels; they offer flexibility.
Picture being able to shift your workbench closer to where it’s needed without breaking your rhythm—this adaptability can vastly improve how efficiently you work.
Flooring Solutions
A seasoned metalworker once advised me on the importance of flooring solutions, particularly regarding foot and leg strain during long hours spent at workbench stations. Implementing rubber mats around work areas significantly alleviates discomfort, much like slipping into cushioned shoes after a day of wearing hard ones. These mats not only promote comfort but also enhance safety by providing traction and reducing slipping risks associated with metal shavings that accumulate during work.
By strategically positioning your equipment and enhancing comfort through flooring choices, you create an environment primed for productivity. Each decision plays a role in shaping an ergonomic workspace that can significantly better your experience and efficiency.
Ensuring Ergonomic Efficiency
Ergonomics isn’t just a buzzword; it’s a fundamental principle that can significantly impact your productivity and well-being while working in a metal workshop. By carefully designing your work environment, you can minimize physical strain, fostering both safety and efficiency. This approach makes it easier for you to utilize your tools and ensures you’re working comfortably, which enhances focus and performance over long hours.
Ergonomic Workbench Design
When it comes to workbenches, adjustable-height models stand out as an excellent choice. They allow you to tailor the height according to the specific task—whether cutting metal sheets or assembling components—reducing the risk of developing musculoskeletal disorders. Remember to position tools within easy reach on the work surface. For example, having tools organized in drawers or toolboxes at waist level can prevent you from overstretching or twisting your body awkwardly.
Think of your workspace as a finely tuned instrument; every adjustment can lead to better harmony between you and the tasks at hand.
Seating Considerations
In many workshops, seated tasks are common alongside standing processes. Here, investing in ergonomic stools or chairs with proper lumbar support makes a significant difference. Look for seating options that provide adjustability to ensure your feet can rest flat on the ground while maintaining your knees at about hip level. On days filled with extensive standing work, consider incorporating anti-fatigue mats that help reduce discomfort by absorbing some pressure on your feet and legs.
This attention to seating comfort naturally leads into the importance of proper lighting, another cornerstone of an efficient workspace.
Lighting
The right lighting is crucial for reducing eye strain and enhancing your ability to see intricate details in your work. Utilize task lighting directed specifically toward areas where detailed activities take place—this could be directly over a bench or inside a machine enclosure for optimal visibility. However, don’t overlook general illumination; installing overhead LED lights provides uniform brightness throughout the workspace, ensuring you avoid shadowed corners where accidents can happen.
When all these ergonomic factors come together harmoniously—adjustable furniture, supportive seating, and effective lighting—you create an environment that encourages productivity while safeguarding against physical strain.
Each element plays a vital role in creating a safe yet dynamic workshop atmosphere that allows for creativity to flourish while ensuring operational safety.
Safety Implementations in Your Layout
Safety should always be at the forefront of your mind when designing your metal workshop layout. Every aspect of the space must be considered to protect both individuals and investments. It’s not just about having the right safety gear; it’s also about integrating features that provide protection without hindering workflow.
Fire Safety
One of the most important aspects of safety in a workshop is addressing fire hazards. Flammable materials, such as gas canisters, solvents, and paints, should be stored in fireproof cabinets to minimize risk. This simple action can help contain any potential fire before it spreads.
Moreover, keeping fire extinguishers within arm’s reach of high-risk areas like welding stations is imperative. Regular inspections to ensure these extinguishers are charged and accessible should be part of your routine.
Think of a fire extinguisher as your first line of defense—just like wearing gloves when handling hot tools or materials. It’s not just about having them; you need to know how to use them effectively during an emergency.
Ventilation
In addition, ventilation plays a crucial role in maintaining a safe working environment. Proper airflow prevents the buildup of harmful fumes generated during processes like welding and cutting. Installing exhaust fans directly over workstations helps to vent these fumes outside while promoting fresh air circulation.
Furthermore, incorporating air purifiers can improve indoor air quality by filtering out hazardous particles and maintaining a healthier workspace.
Imagine working in a confined space filled with harmful smog—it’s uncomfortable and potentially dangerous. Adequate ventilation ensures that you can focus on your tasks without worrying about inhaling toxic fumes.
Emergency Exits
Finally, ensuring clear paths to emergency exits is not something to overlook. Ideally positioned exit signs should illuminate pathways, especially in larger workshops where confusion might occur during an urgent situation. Assessing your layout frequently for any obstructions that could hinder safe egress is vital.
Make it a habit to conduct drills so that everyone is familiar with evacuation procedures in the event of an emergency.
Just as you would plan for regular tool maintenance, plan for safety drills. Knowing the best escape routes could make all the difference when minutes count.
Prioritizing safety implementations lays the groundwork for efficiency in your workshop, which paves the way for exploring effective strategies for optimizing storage and accessibility in your space.
Maximizing Storage and Accessibility
When it comes to organizing your metal workshop, think of it as a puzzle where every piece needs to fit just right. Efficient storage solutions not only keep your workspace tidy, but they also play a critical role in enhancing your productivity. By ensuring that tools and materials are within arm’s reach, you can minimize downtime and maintain a smooth workflow.
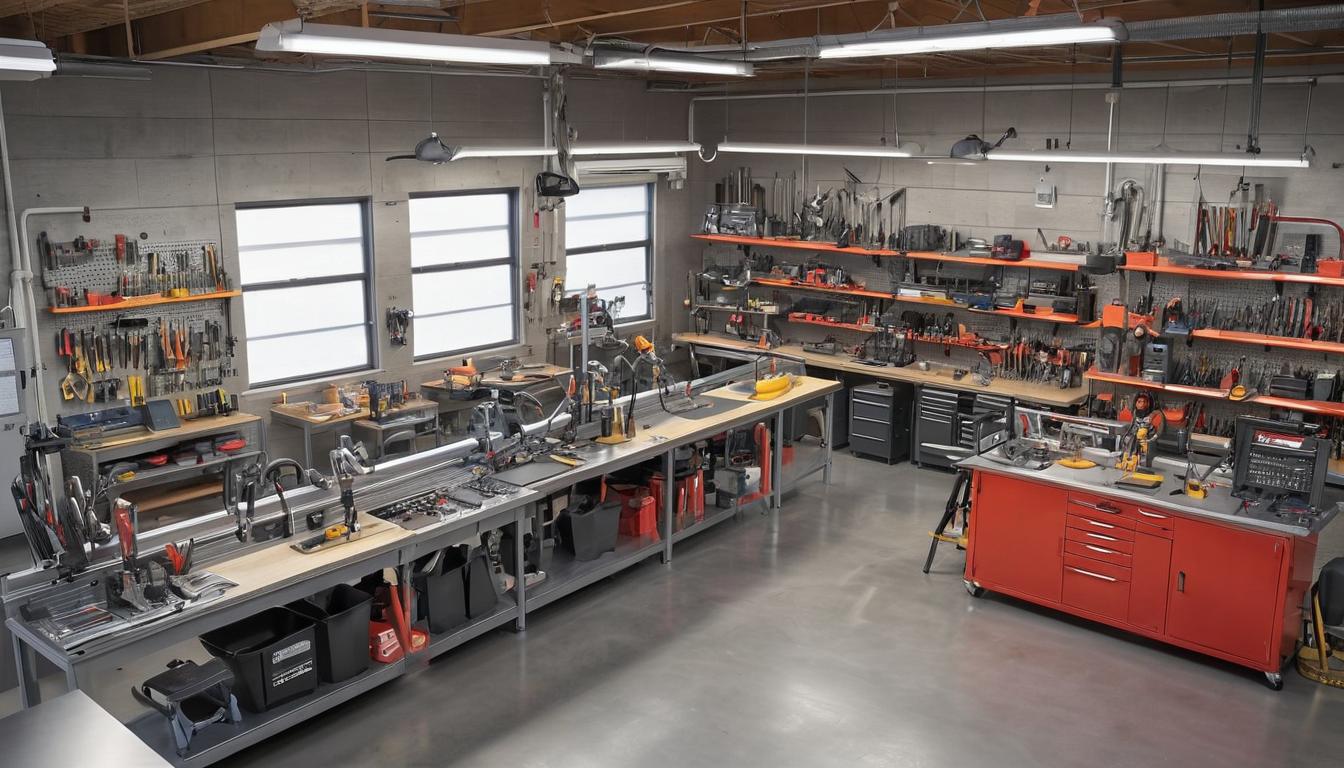
Vertical Storage
One of the best strategies for maximizing space in any workshop is taking advantage of vertical storage. Wall-mounted shelves and pegboards can transform empty wall spaces into functional areas for organizing tools. For instance, using a pegboard allows you to hang frequently-used items, so they’re visible yet easily accessible. The idea is simple: the more you can see what you have, the less time you’ll waste searching through cluttered drawers or boxes.
A quick tip: Consider incorporating magnetic strips to hold small metal tools like wrenches or screwdrivers. This keeps them at eye-level and ensures they’re always ready when you need them. I once installed such strips in my own shop, and the difference was remarkable — no more rummaging through a mess!
Mobile Storage Units
Beyond vertical solutions, mobile storage units can be game-changers in terms of accessibility. Rolling carts and mobile workstations allow you to bring tools and materials directly to your project area instead of running back and forth across the workshop. Picture this: you’re in the middle of an intricate build, needing that specific screwdriver while knee-deep in the task—having everything on wheels means you can just roll over to grab what you need without breaking stride.
Additionally, these mobile units often come with multiple compartments, allowing you to categorize items by function, size, or frequency of use. As an extra layer of organization, it’s beneficial to label storage bins clearly. Not only does this save time during busy projects, but it also helps prevent chaos from creeping back into your space.
Design your workshop with ease of access as a top priority; it makes all the difference on those long days spent troubleshooting problems.
With organized storage methods established, exploring examples from other workshops can amplify your creativity and provide innovative insights tailored specifically for increased efficiency.
Inspirational Layout Examples and Ideas
Sometimes, taking a look at well-designed workshops can ignite your imagination and reveal possibilities you hadn’t considered. When envisioning an efficient workspace, consider how each layout can cater to your specific needs and aesthetic preferences. Beyond just functionality, an inspiring design can transform your workshop into a place you love working in, whether it’s for professional use or personal hobbies.
Example Layouts
| Workshop Size | Key Features | Description |
|---|---|---|
| Small (10×15) | Mobile workstations, vertical storage | Perfect for hobbyists. Compact but highly organized using wall space to store tools vertically. |
| Medium (20×30) | Designated project zones, ergonomic design | Ideal for serious DIY enthusiasts offering distinct areas for cutting, welding, and assembly. |
| Large (30×50) | Industrial equipment, safety zones | Suitable for professional use, providing ample room for heavy machinery and multiple projects underway simultaneously. |
For those with smaller spaces like a 10×15 workshop, utilizing mobile workstations can be a game changer. Imagine creating a dynamic environment where tools are easily accessible and can be moved around based on the task at hand. Vertical storage solutions will help take advantage of every square foot while keeping everything organized. Your materials should be displayed proudly rather than hidden away, enhancing not only efficiency but also aesthetic appeal.
As workshops grow larger, such as medium-sized options around 20×30 feet, you have the opportunity to designate specific zones for different tasks. A thoughtful layout allows you to segment the space into cutting areas, welding stations, and assembly lines. This division improves workflow while ensuring safety—keeping sparks from welding away from flammable materials and promoting an organized atmosphere.
For those fortunate enough to have expansive spaces of 30×50 feet or more, the sky’s the limit! Here you can incorporate industrial-grade equipment without feeling cramped. Safety becomes paramount; consider integrating proper ventilation systems and clearly marked safety zones to create a secure environment for heavy machinery operations. The extra room also allows for simultaneous projects, making it easier to focus on various tasks without disrupting others.
Customizable Options
Beyond these examples, think about customization. Each design should reflect your unique preferences and workflow requirements. This is where companies like Roi Metal Buildings come into play with their customizable metal buildings. You have the freedom to tailor both the size and layout according to your specific requirements—a perfect opportunity to craft not just a workshop but an optimized workspace built from the ground up.
With these ideas and visual inspirations in mind, you’re not just looking at potential layouts; you’re actively designing a lively space where creativity thrives alongside efficiency.
Summary: The Ideal Metal Workshop Layout
Get started on your new and improved metal workshop layout by contacting ROI Metal Buildings today to get your new metal building. If you’re considering a project involving metal workshops, don’t hesitate to reach out—talk to us at ROI Metal Buildings or call us at 865-316-9009 today! Also, if you like our content and want to stay up to date, follow us on Facebook at https://www.facebook.com/roimetalbuildings!